Regardless
of the type of link, making links involves two main steps:
-
Identify
the text or image that is to serve as the link.
-
Identify
the location of the page that is to open in the browser
when the link is clicked.
External links
Use
an external link to link to a Web page that is not
part of your own site. That is, to link to another Web site.
- Select the
text or image to serve as the link:
Highlight
the text by clicking and dragging:
OR
Click on an
image: 
- Insert the
Web address (URL) of the site to which you want
to link in the Link field of the Property Inspector as
shown:

Internal links
Use an internal
link to link the pages of your own site together. The pages
should be in the same folder as the current page.
Because such
links refer to other saved documents on your computer, you
should always save a new document before creating internal
links.
- Select the
text or image that is to serve as the link:
Highlight
the text by clicking and dragging:
OR
Click on
the image: 
-
Insert the
filename of the page to which you want to link in the
Link field of the Property Inspector in one of the following
ways:
-
Locate
the file by clicking on the folder icon as shown:

-
Navigate
to the file you want to link to.
-
Select
the file name.
-
Click
Open.
Targeted links
Use this type
of link to connect parts of the same Web page, or to link
to a specific point on another Web page (rather than having
the page display begin at the top of the page, which is
the browser default). Targeted links are very useful for
creating cross-references on a page.
Creating targeted
links is a two-step process:
-
Identify
the location (on the page) to which you want to be able
to link (called the anchor or target).
-
Create the
link.
Identify the
target (anchor)
-
Bring the
portion of your page to which you want to be able to
link into view in your browser window.
-
Place your
cursor at the location you would like to link to.
-
Choose Invisible
Tags - Named Anchor from the Insert menu.
-
Type a name
for this location on the page on the Anchor Name: field.
The name can be any word or words you choose, but for
best results choose something meaningful. The name may
not contain any spaces:
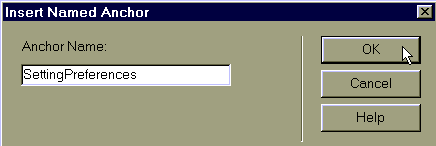
- Click OK
as shown above.
This inserts an invisible element icon on the page similar
to this:  .
.
This icon will not appear on your published page on the
Web. It merely serves as a place-holder while you're working
on your page.
Create the targeted
link
-
Select the
text that will serve as the link.
-
Enter the
Anchor Name in the Link field of the Property Inspector:
Email links
-
Select the
text or image to serve as the email link.
-
Insert the
URL for the email address to which you want
to link in the Link field of the Property Inspector.
Email URLs look like this: mailto:wagonerbj@unk.edu.
NOTE:
That the URL begins with mailto: and, like
all URLs, it does not contain spaces.
Removing links
Regardless of
the type of link (external, internal, targeted, or email),
the method for removing a link is the same:
-
Select the
text or image that currently contains the hyperlink
information.
-
Delete the
URL shown in the Link field on the Property Inspector.
-
Press Return.
Editing links
To change the
URL associated with a hyperlink:
-
Select the
text or image that currently contains the hyperlink
information.
-
Change the
URL shown in the Link field on the Property Inspector:
-
Press Return.
To change the
text associated with a hyperlink simply use standard word
processing techniques to change the words that serve as
the clickable text for the link.

